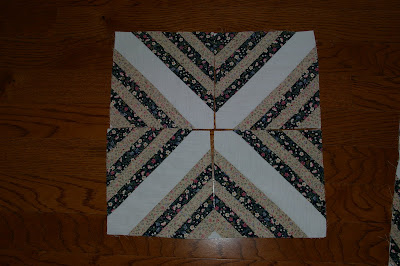
This is another old quilt project I started years ago in a class with a friend. This is so old, I can't even find instructions or a pattern but I think I can finish it from observing what I've done thus far. My mother calls this a string quilt. The squares above are squares of muslin. After the squares and strips are cut, you draw lines with a pencil onto the muslin the same distance from the point (zoom in to see close-up) and sew the strips onto the muslin, beginning with sewing the first strip on each side at the pencil line, right sides together. You can use any dimensions or measurements for the squares and strips that you want depending on the size you want your finished quilt square (and quilt) to be when finished.

This first strip is turned to the right side and pressed. Then the next strip is sewn, right sides together and raw edges together to this strip and continue until it looks like the photo below.

Here are four square units ready to be sewn together into a block.

This is a close-up of one unit finished after strip piecing.

I took my four units and put them together in this order for my block. There are so many possibilities in designing your quilt block with these units as you'll see below. It all depends on the direction you sew your units together to get a different look. This is the only geometry I like!


See the three other possibilities of designing your quilt square? I've only sewn one together and now I need to decide which design I like the most or do I mix it up? I definitely want to update it by adding pink, pink, pink to the browns and blacks. So many projects, so little time :) NOTE: This was NOT intended to be a tutorial! Just a description (and not a very good one - I"m sorry!) of how I started and plan to finish this quilt. I will probably add the pinks in the borders, binding, etc. Sometimes I just fly by the seat of my pants!

2 comments:
Oh, no. Your explanation was great. I went through each step and photo and it totally helped me to understand. Very cool. You can't go wrong whether you stick to one geometric design or use all in the same quilt. I hope you'll post as you proceed. And adding some color will be very nice, too.
I have seen these type of quilts before and I think they are so pretty! Definitely finish it so we can see the whole thing and I love the idea of some pink thrown in for good measure. I don't wear pink very often, but I love it in quilts!
Thanks for the information on the iron as well. Mine was about ten years old so it was time to go, but I will keep it clean now with some good old vinegar.
Post a Comment